Classic. Smooth. Versatile.
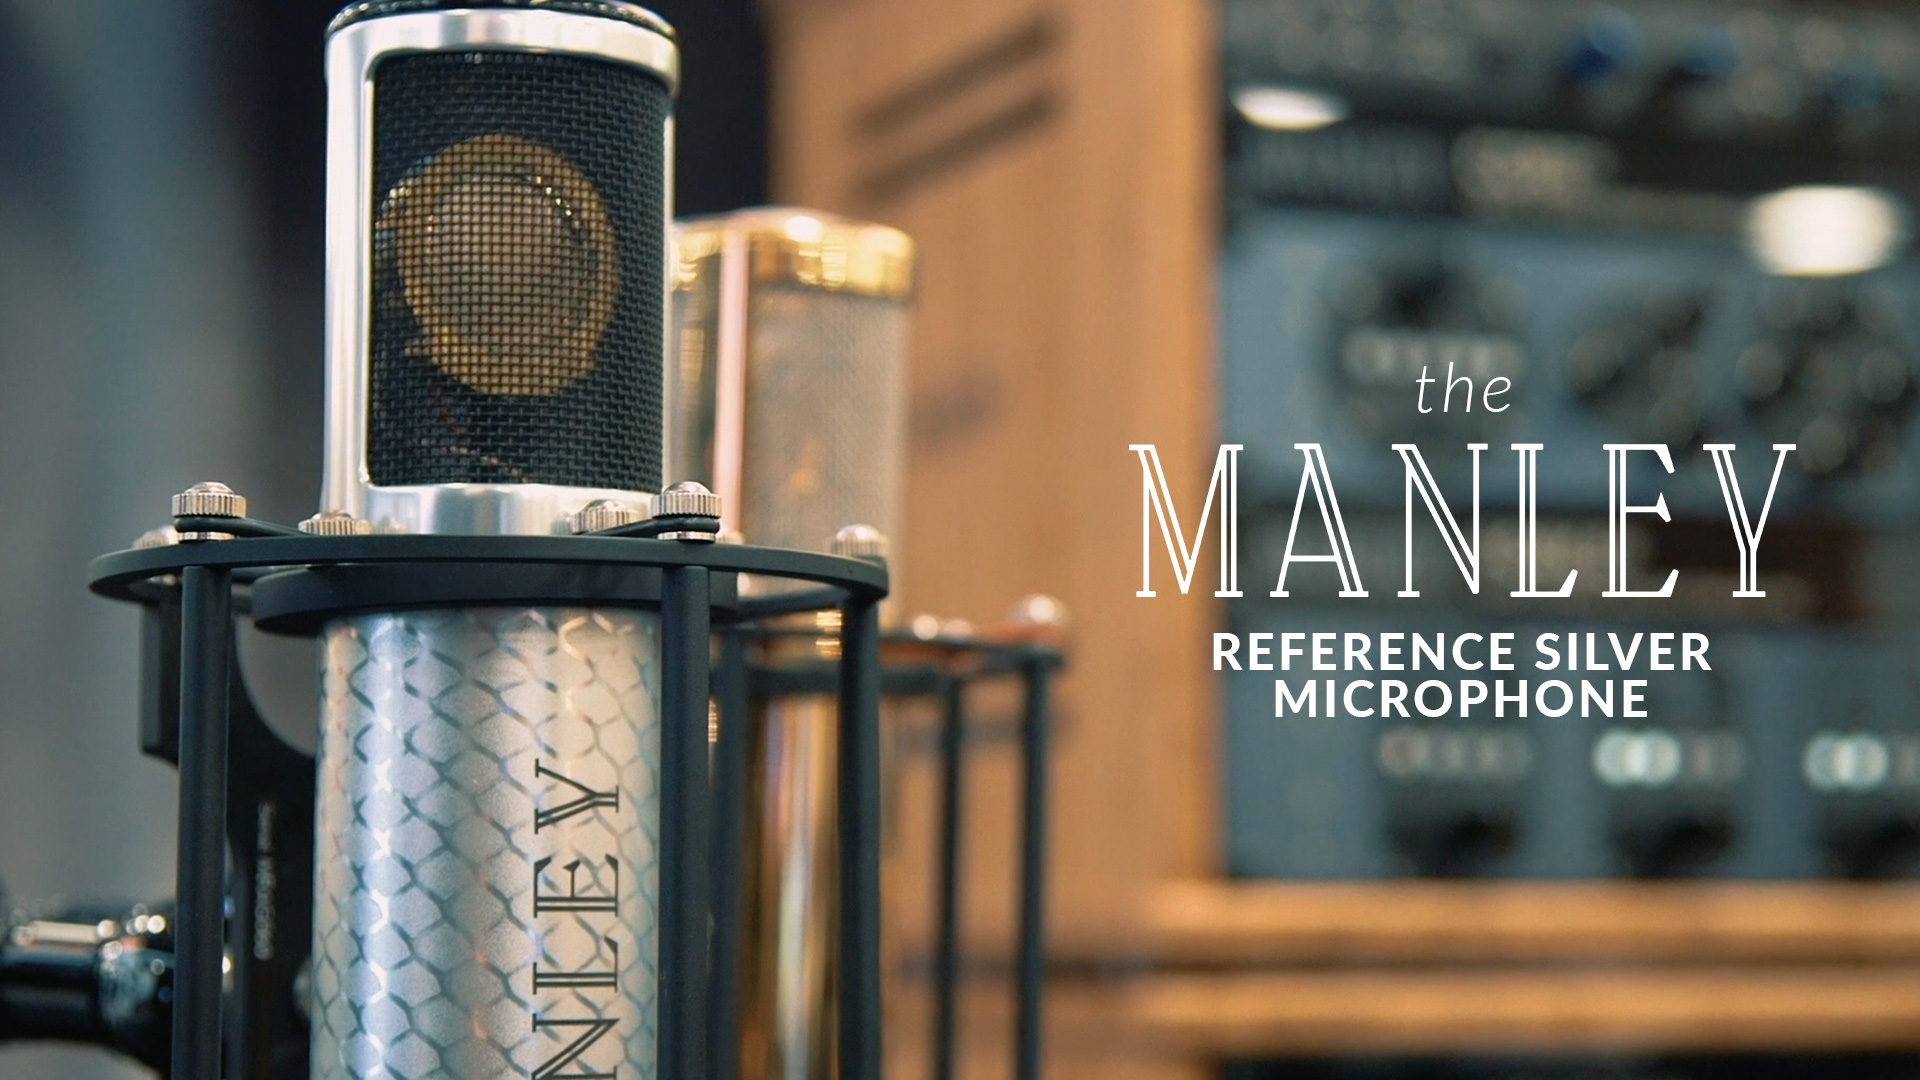
Taking inspiration from the fabled Sony C-37A, Manley Labs introduces the Manley Reference Silver Microphone. Featuring an American built capsule by David Josephson and a Manley designed circuit, this microphone has a warm and rich tone.
WANT TO HEAR IT? Compare all three Manley mics on the same sources and see which one is the best fit for YOU.

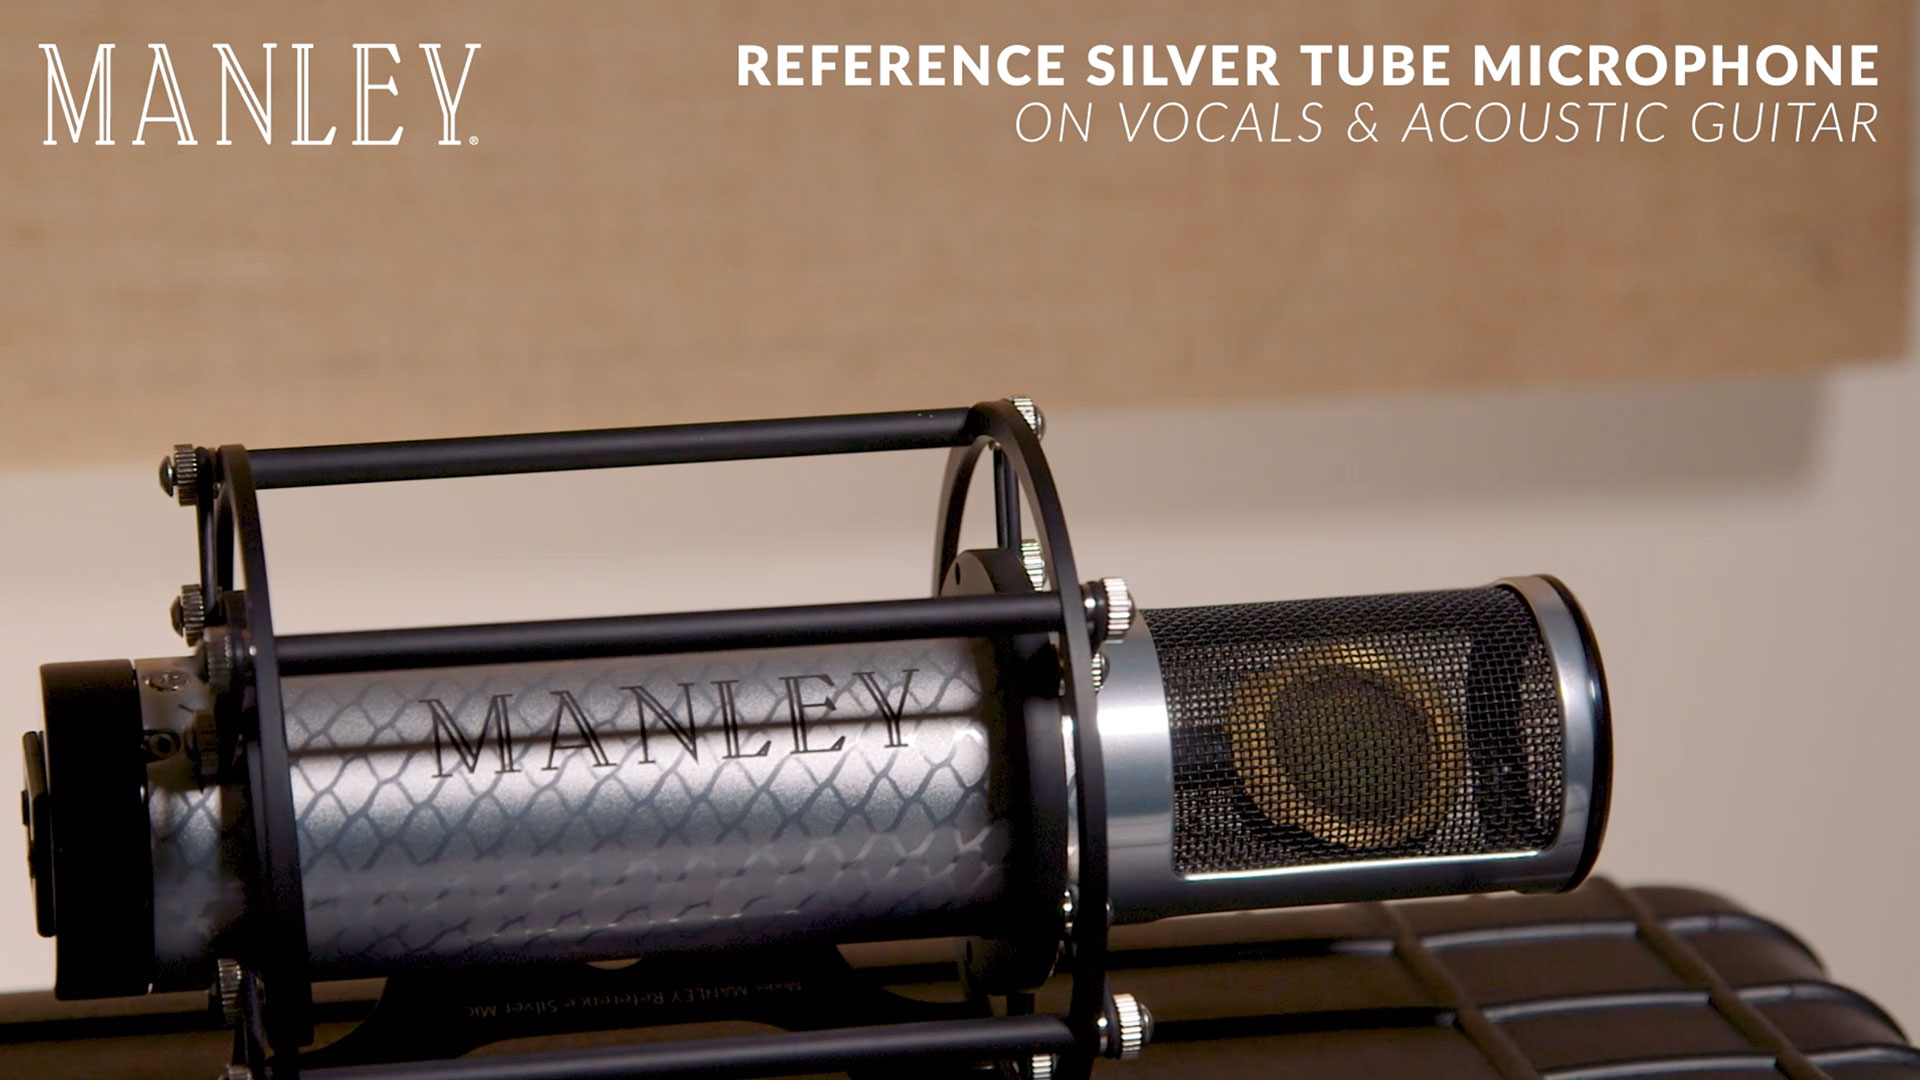

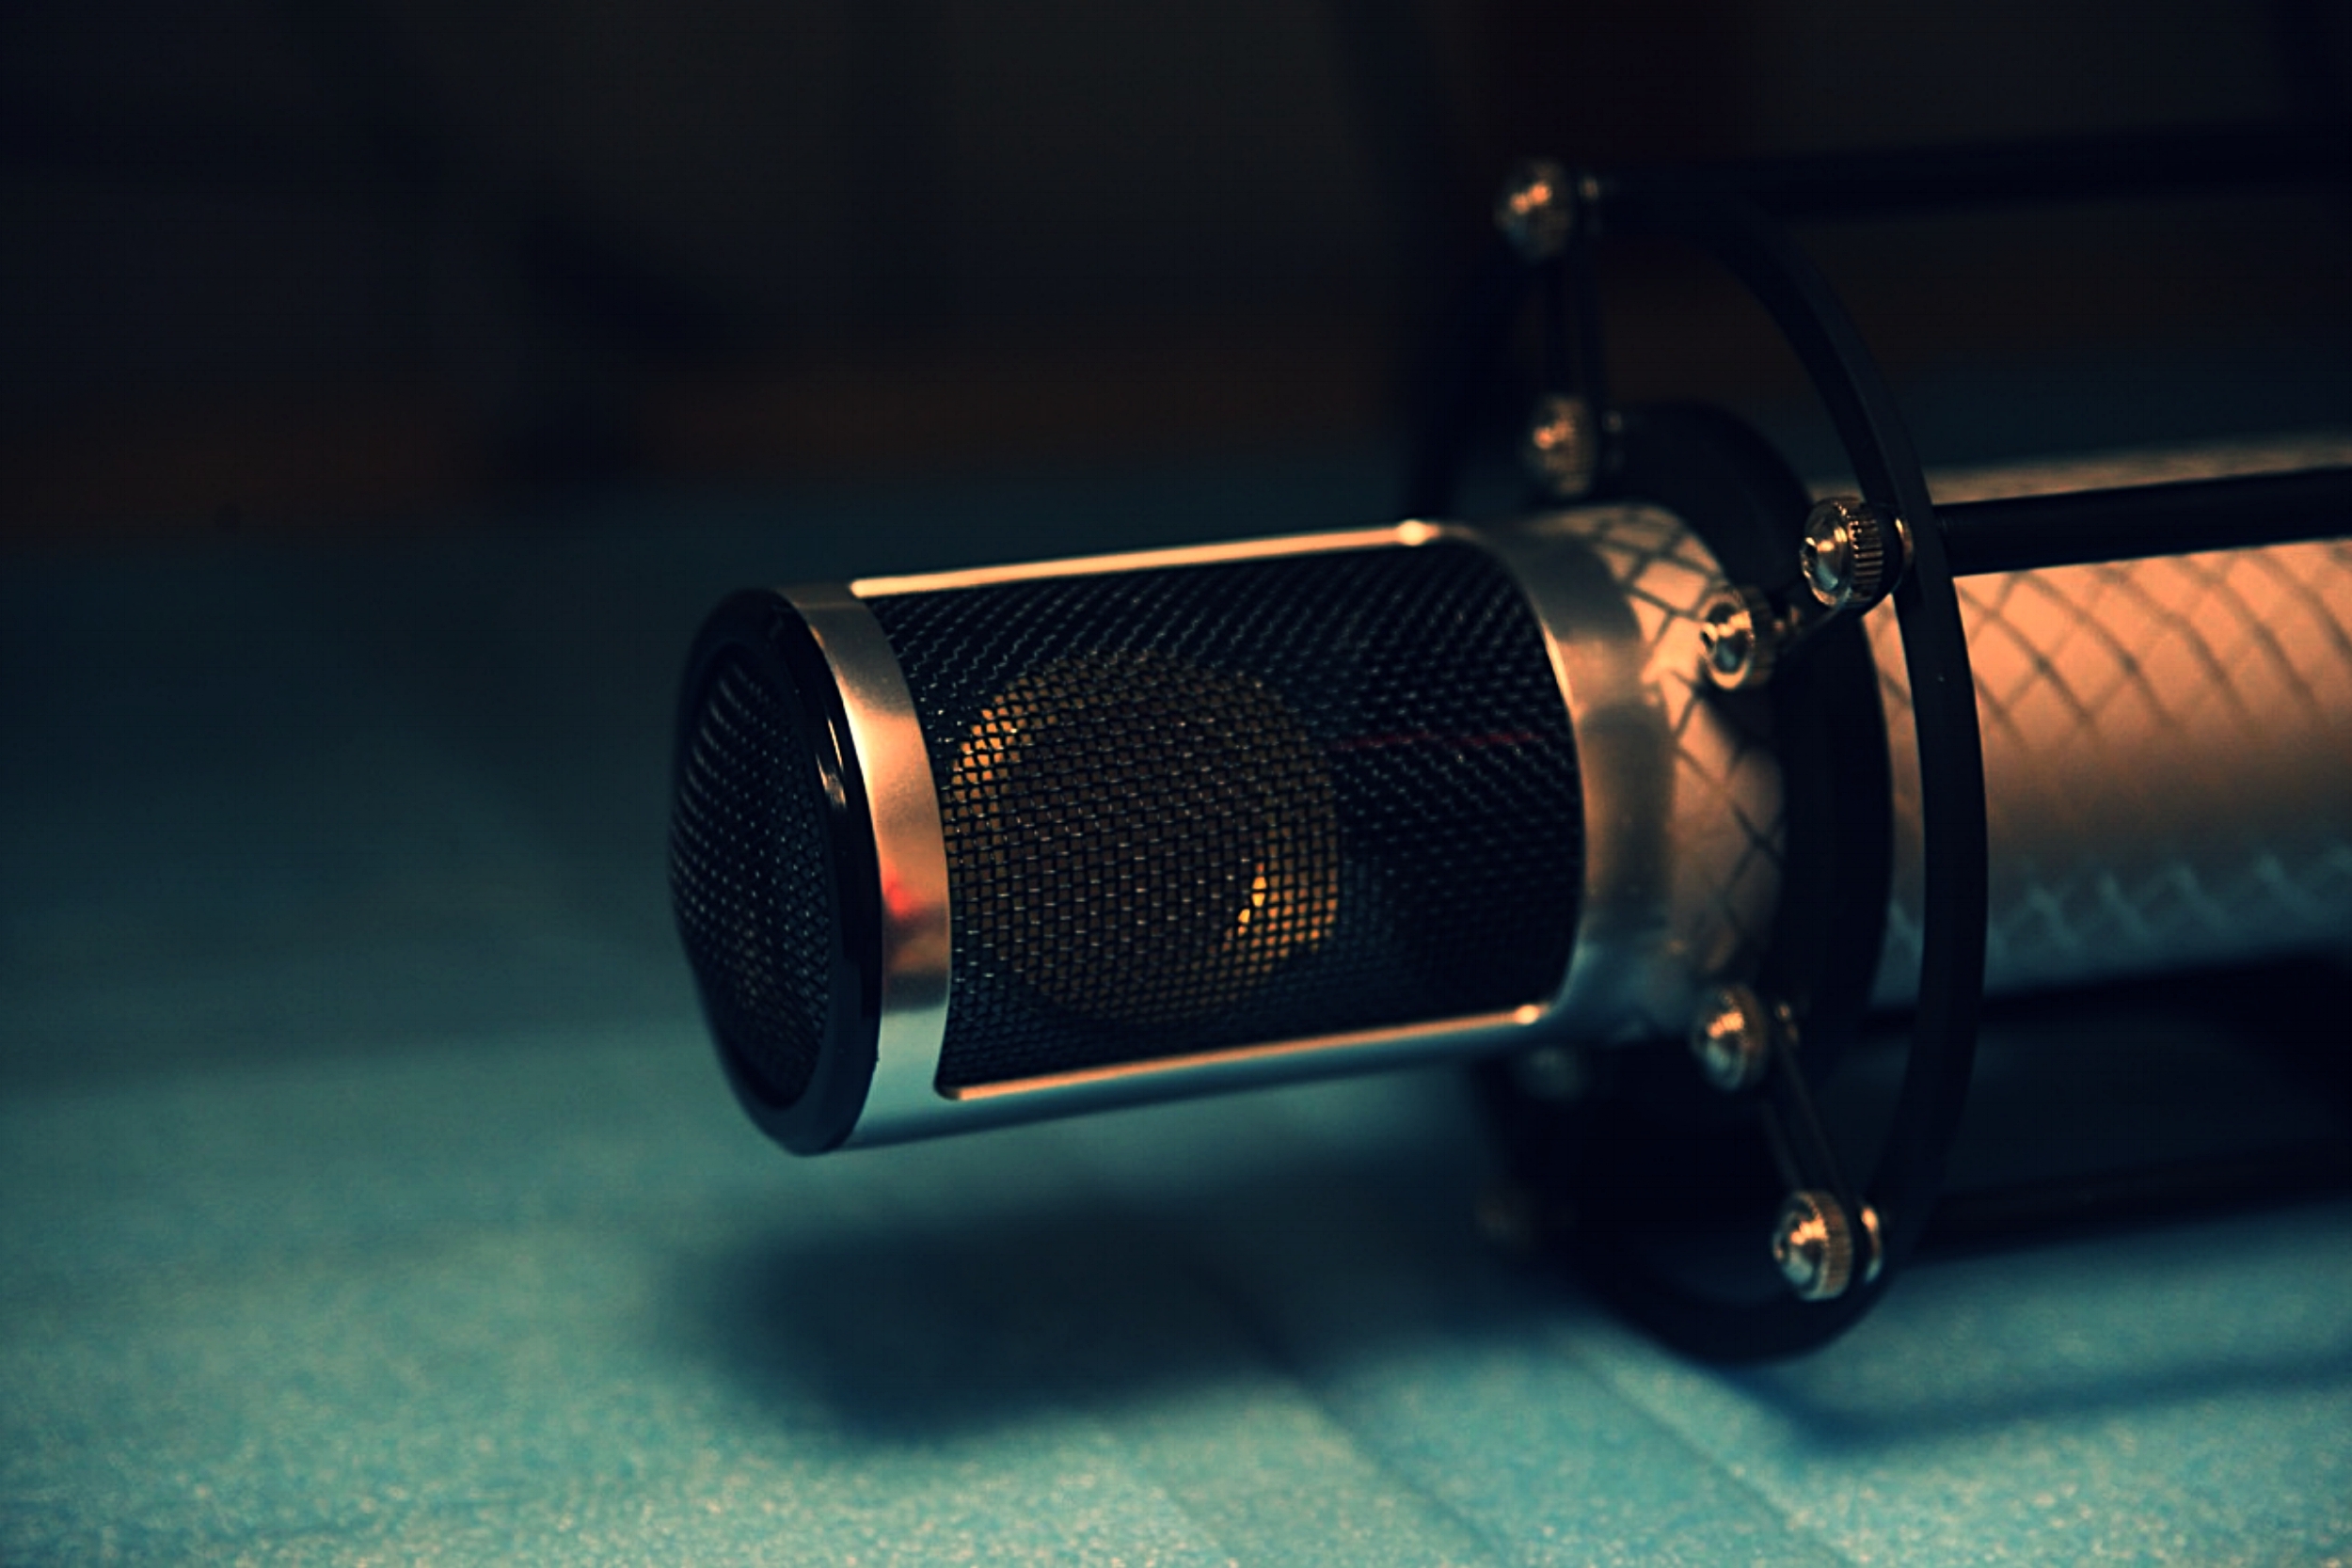
The Manley Reference Silver Microphone offers a mechanical selector on the rear of the head basket that is switchable between cardioid and omni pick-up patterns. Boasting a mic grade 5670 vacuum tube, Manley IRON® transformers, and a low-noise switch mode power supply, the Manley Reference Silver Microphone is a studio workhorse.
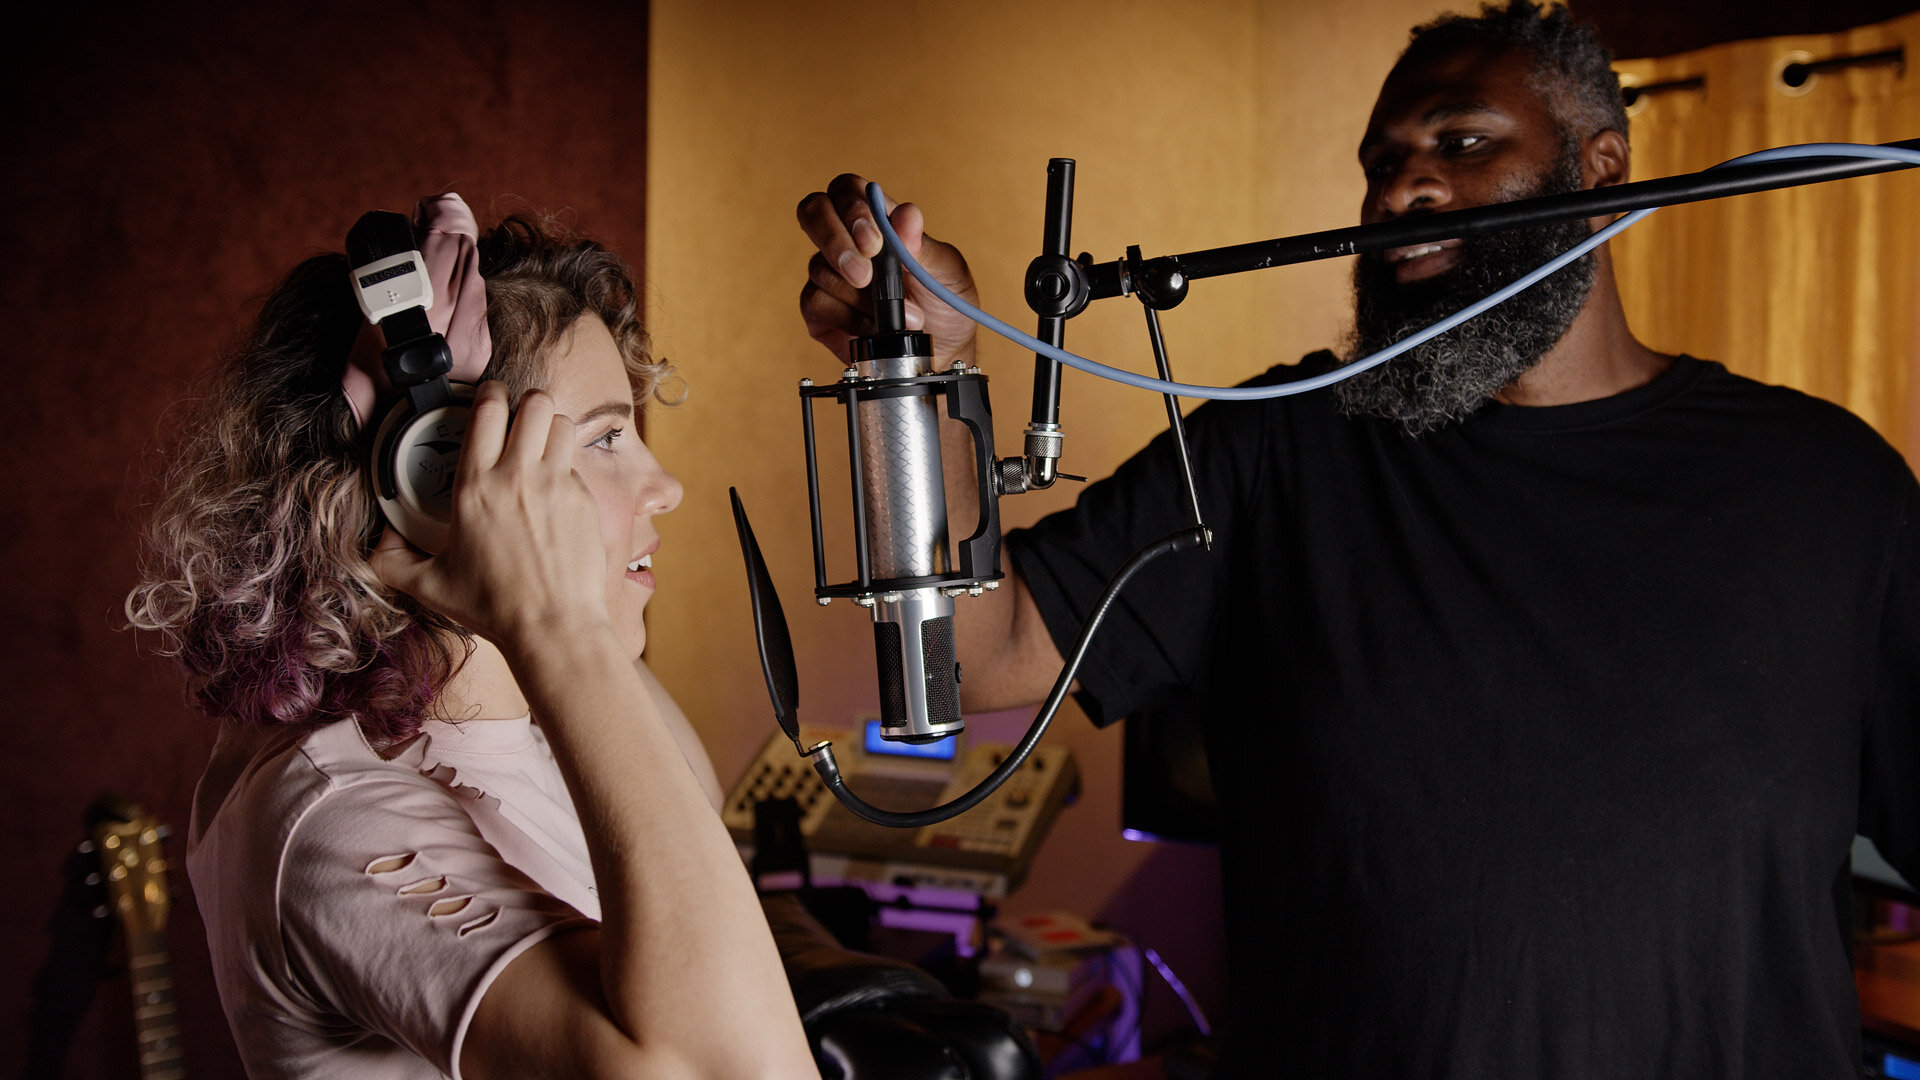
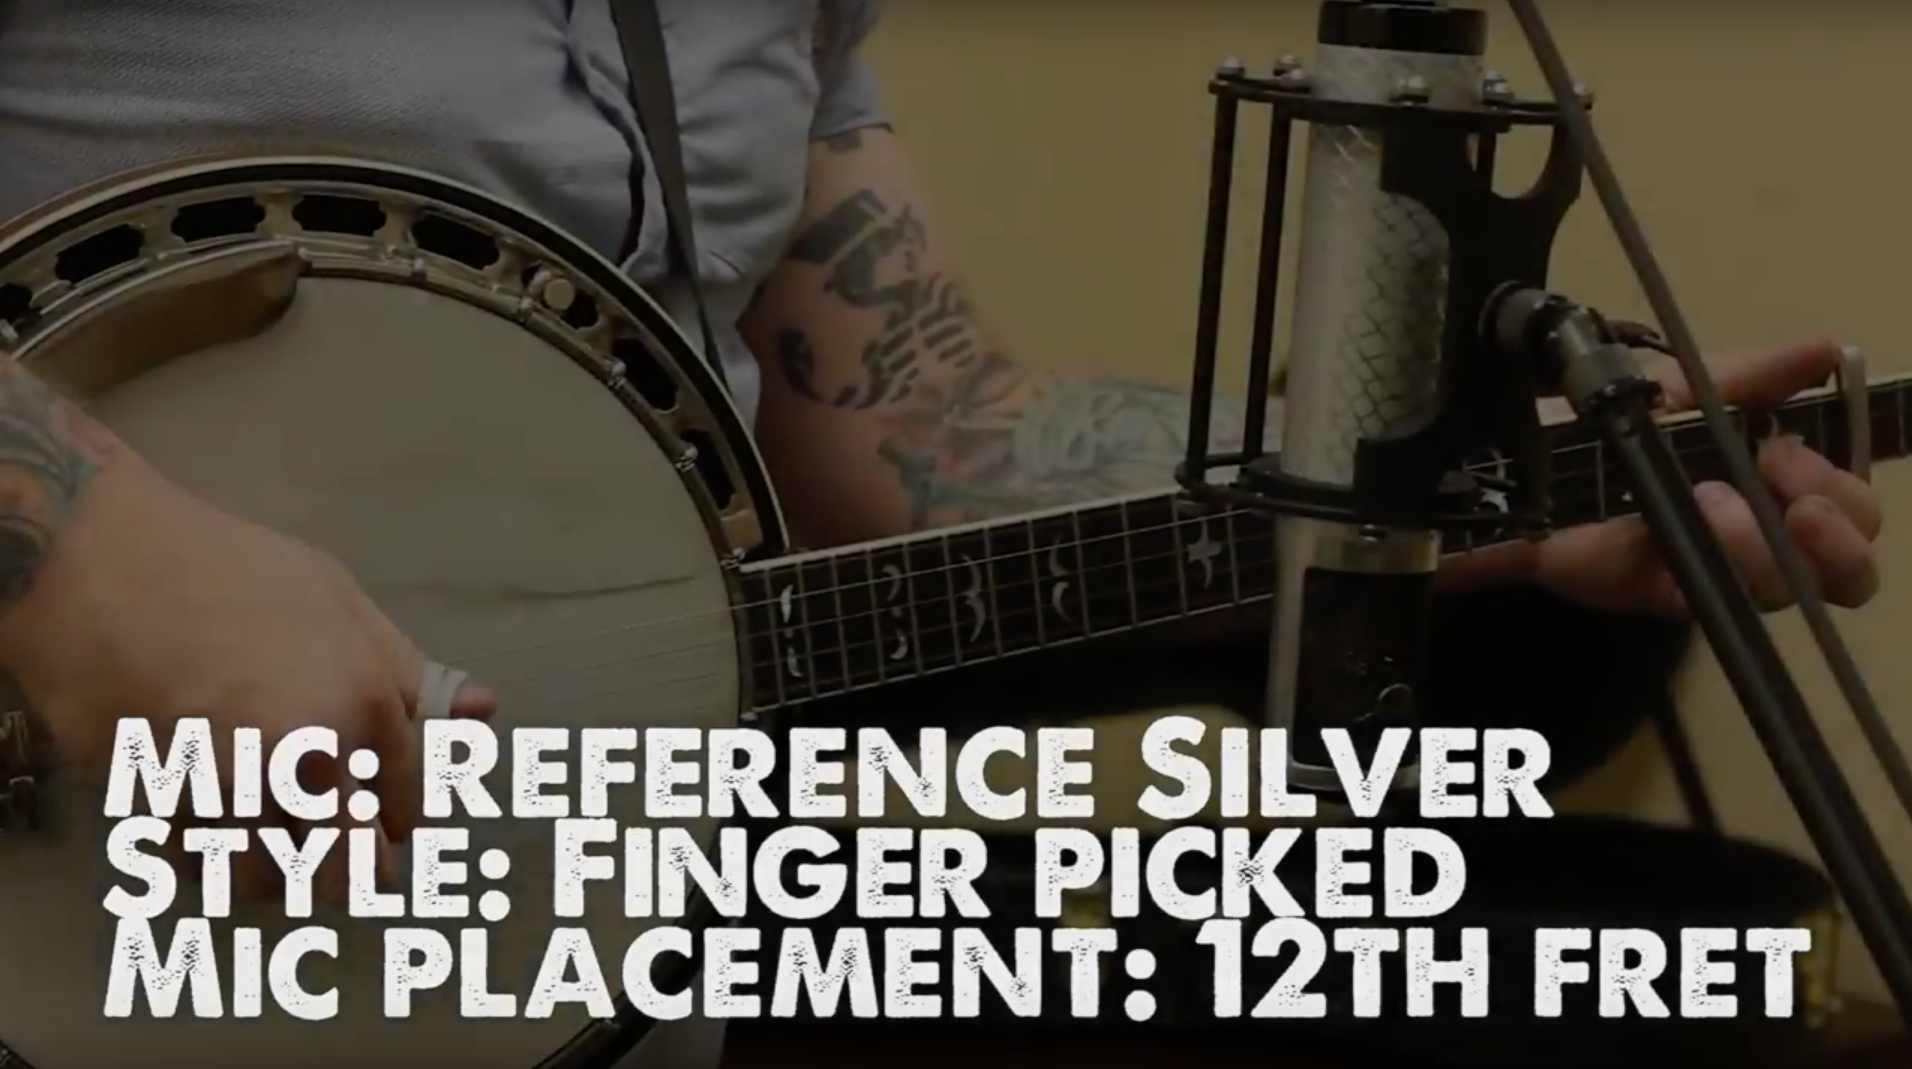
This microphone is at home in-front of instruments that range from female vocalists, to saxophones, from drum overheads to banjos. Use the Manley Reference Silver Microphone where you might be thinking about a ribbon, and use it with confidence!
"We are using it on everything! Incredible detail but also super smooth!"
– Butch Vig (Nirvana, Smashing Pumpkins, Garbage) –

DETAILS
After 27 years since the debut of the first Manley Reference Gold and Reference Cardioid tube microphones which have since become modern classics, we introduce to you the Manley Reference Silver Microphone. The audio inspiration for this handcrafted beauty begins with the 1950s classic Sony C-37a microphone, and specifically with California capsule maker David Josephson's fantastic recreation of the C-37’s C-3 capsule which features an adjustable acoustic chamber on the rear of the capsule for the user to switch between Cardioid and Omni pickup patterns (see the adjacent photo for a close-up). This distinctive capsule is the heart of the rich and creamy tone that the Manley Reference Silver Mic delivers today, and reliably with a five year factory warranty. The old SONY mics are super-rare at this point, if you can find a decent working example of one!
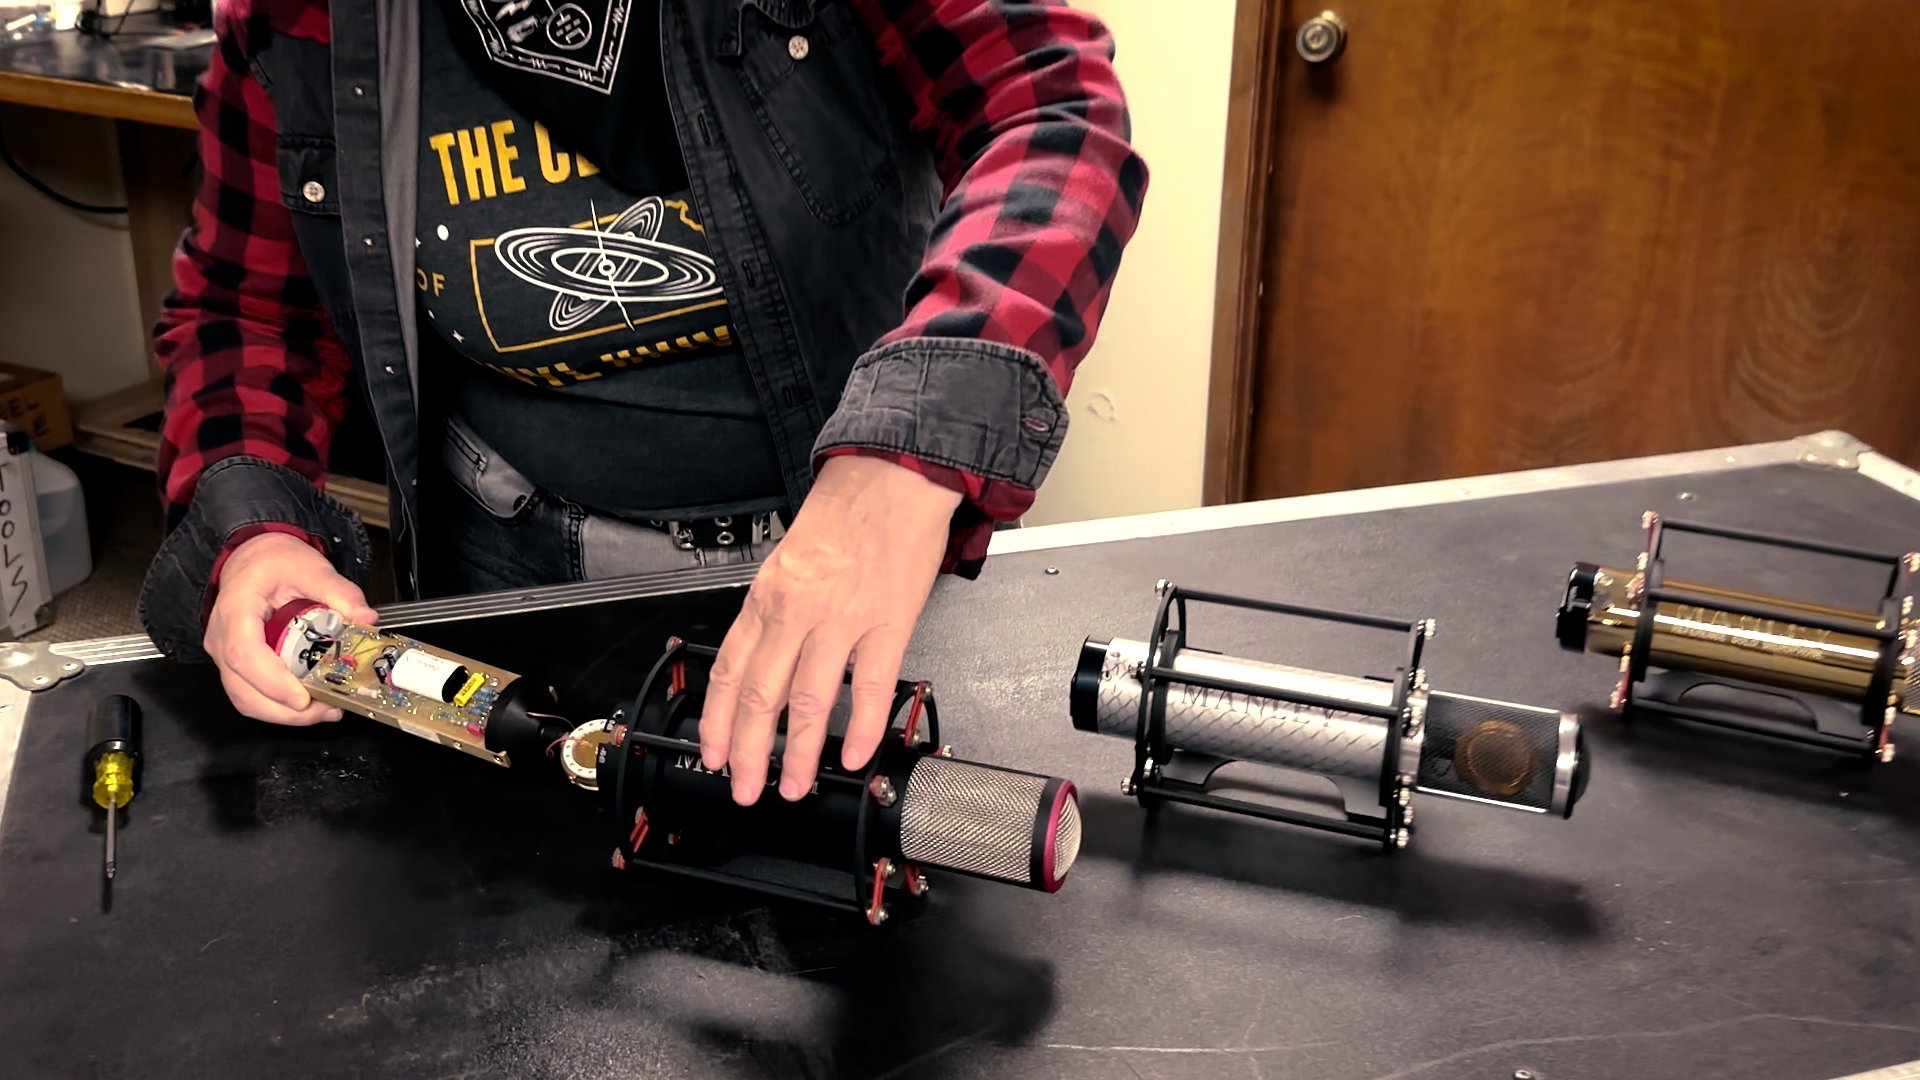
Inside the mic, we are using a different circuit from our other two microphones. The fragile high impedance signal from the capsule first hits a FET sitting underneath the 5670 vacuum tube’s cathode which then amplifies the signal into a more robust voltage that our hand-wound Manley IRON® microphone output transformer sends out to your microphone preamplifier. Output level from this mic is a wee bit lower compared to our other two microphones, but after careful consideration coming through the Beta-testing phase of development, we decided to leave it there as this mic will find a forever-home in front of your loudest instruments such as snare drum, guitars, and toms. It's a real natural there!
Sonic character of the Reference Silver is on the rich and warm side. You'll find this microphone stunning with female vocals and saxophones, with a round character that is never sibilant or boxy. A brass section will sound rich and cohesive. This microphone with its bountiful and warm middle tonality also is a natural for drum overheads where you might have too much brightness off the cymbals from other microphones. It is a very classic sounding microphone, which is to be expected since its innovative capsule design harkens back to the 1950s. Use the Manley Reference Silver Microphone where you might be thinking about a ribbon, and use it with confidence!
DRIVEN BY MANLEY POWER®

The trailblazing power supply is a brand-new derivative of our wildly successful MANLEY POWER® SMPS already in use in the Manley CORE® Reference Channel Strip, Manley FORCE® 4-channel microphone preamplifier, and Manley Nu Mu and ELOP+ Stereo Limiter Compressors designed for us by the worldwide experts in this technology, Bruno Putzeys and Nand Eeckhout. This power supply was designed for us, designed for vacuum tubes, and designed especially for audio fidelity. Numerous listening comparisons again prove the sonic superiority of this power supply. All lines are regulated, all rails come out at super-low impedance, and there is zero 50/60 Hz ripple component present in the chassis as the module runs at a much higher frequency well above the audible range. It is an efficient design in the high 90th percentile, and it functions it any mains input voltage from 90 to 250 V AC meaning no reconfiguration is necessary when traveling around the world. Just plug it in! It is a well-smart invention light years ahead of older linear power supply designs. We are going to brag about our awesome power supply, for sure!


Our proprietary precision suspension system is provided with each Reference Microphone (the capsule itself is mounted onto a rubber shock-mount.) Because the entire working "guts" of the microphone may be removed for service in one piece from the housing, it is envisioned that the microphone need not be removed from the suspension. We also provide a very useful swivel of our own design with every REFERENCE MICROPHONE; its T-bar handle and locking clutch action require no tools to adjust. And no MANLEY microphone would be complete without a genuine leather capsule protector which slips (and ties) onto the end of the microphone to protect the capsule when not in use.
Each REFERENCE MICROPHONE is packaged complete in a rugged carrying-case.
Like the other Manley Reference Microphones, all of the metalworking and construction is hand-assembled in the USA by our experienced staff in our Chino, California factory, located just 35 miles east of Los Angeles. We are sure you’ll love the organic nature of the intriguing artistic finish of the Silver Microphone as it will remind you about how natural and alluring the sound of this microphone is.

SPECIFICATIONS
Condenser Transducer based on vintage Sony C-37A Hand Made in USA by Josephson Audio
Single-Sided Large Diaphragm Capsule Edge Tensioned
5 Micron Evaporated Gold Diaphragm 1" diameter
Dual Pattern Cardioid or Omni Directional adjustable via vent on the backplate
5670 Internal Vacuum Tube Head Amplifier
Constant Current Source for Tube Minimizes Noise and Tube Selection
Hand Wound Nickel Core Manley Iron Output Transformer
Output Impedance: 30 Ohms
High Pass Filter Switch -3dB @ 55Hz 6dB/8va
FREQUENCY RESPONSE: 10Hz-30kHz, AMP to 60kHz
MAXIMUM INPUT SPL: 150 dB SPL at Capsule
SENSITIVITY: 7mV/Pa
AMPLIFIER TYPE: 2 Triode Gain Block Lo Z Output
OUTPUT POLARITY: Balanced XLR, Pin 2 Hot, Pin 3 Low
AMPLIFIER DISTORTION: Less Than 0.05 % THD+N BW 22-22 kHz (1kOhm Load, 1kHz -40dBV Output)
AMPLIFIER NOISE: Typically -108 dBV “A Weighted”
BODY: Etched Silver Anodized Aluminum
Mic Weight: 1.5 lbs
PSU Weight: 2.35 lbs
Size: mic body 2" diameter x 9.7" long x 4.5" (mic suspension outside diameter)
PSU Size: 5" x 3.3" x 9.3" (including handle)
Custom Designed Outboard Switched Mode PSU 90V ~ 250VAC Universal Voltage Operation 50Hz-60Hz
Power Consumption: 8 Watts
PSU Mains Fuse: 5mm X 20 mm, 2A @ 250V, CERAMIC, Slo-Blo
Specifications subject to change because they just might.
REVIEWS
The BEST UNIQUE Microphone? Manley Reference Silver! Thanks Mad Steex!
Video Review from Mark at Higher Hz
"We are using it on everything! Incredible detail but also super smooth!"
- Butch Vig (Nirvana, Smashing Pumpkins, Garbage)
"The Reference Silver helps me to remove the technical aspect of creating a record from my mind. It sounds great, the vocalist loves it, and they’re inspired to give their best performances."
- Dré Bowman (Lady Gaga, Usher, Drake)
"Smoky and silky and beautiful, man…right up my alley. I was doing a record with Cat Power, and we used it a ton."
- Rob Schnapf (Beck, Elliot Smith, Foo Fighters)
"This microphone has such girth in the bottom and a nice smooth top end. I really love it!!!"
- Mark Needham (Fleetwood Mac, The Killers, Imagine Dragons)
“…the most striking thing about the sound of the Reference Silver is its bass response, which is not only prominent by also seems to extend practically to DC…its sub-100Hz response is absolutely thunderous. As a room mic on drums, for example, it may leave you feeling there’s no need to close-mic the kick drum.”
- Sound On Sound, October 2022
"…always elegant, without aggressiveness. We are indeed in the presence of a powerful microphone...we get everything we need without exaggeration."
"The sound of the Reference Silver can best be summed up as ultra-smooth and rich yet crystal clear. Its top end, while quite detailed, has a beautiful roundness to it...it retains a great dimensionality…On vocals—especially the female voice—acoustic guitar and violin, this mic is literally a natural. On more aggressive tones...it really surprised me by how well it worked to control and seat the high sizzle and amp aggression...without losing said aggression by sounding too pillowy."
- Paul Vnuk Jr, Recording Magazine
"…toujours élégants, sans agressivité. Nous sommes bel et bien en présence d'un micro-performant...nous obtenons tout ce qu’il faut sans exagération."
RESOURCES

FREQUENTLY ASKED QUESTIONS
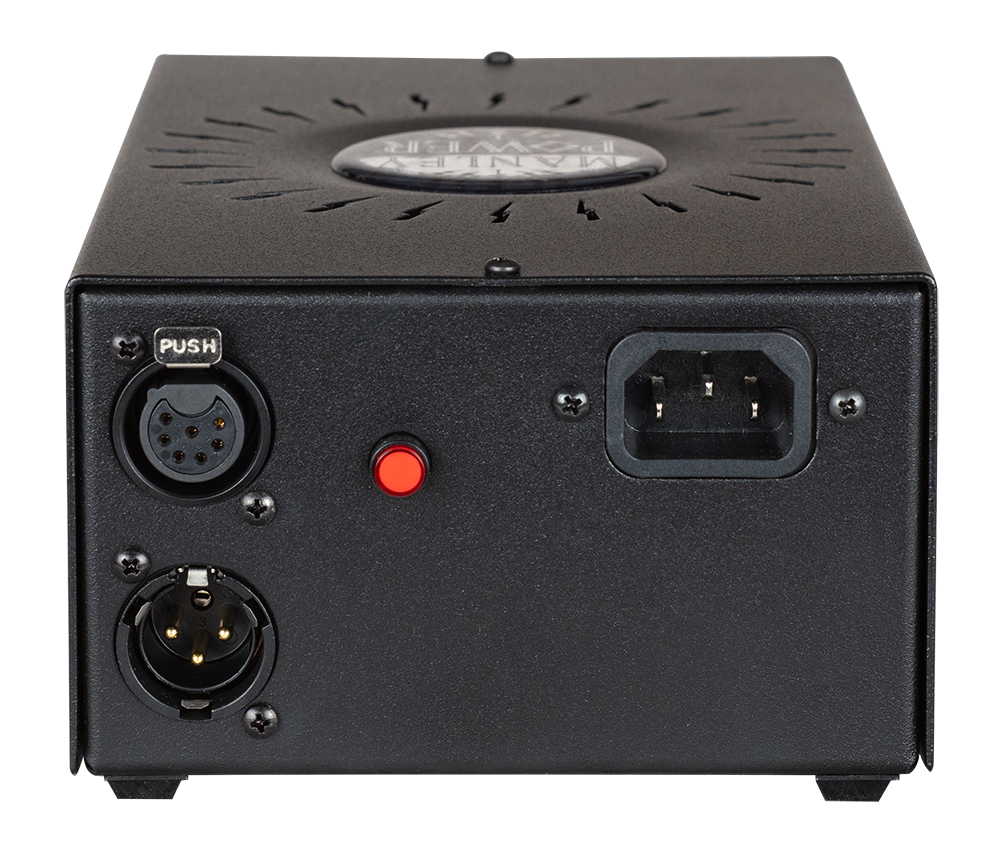
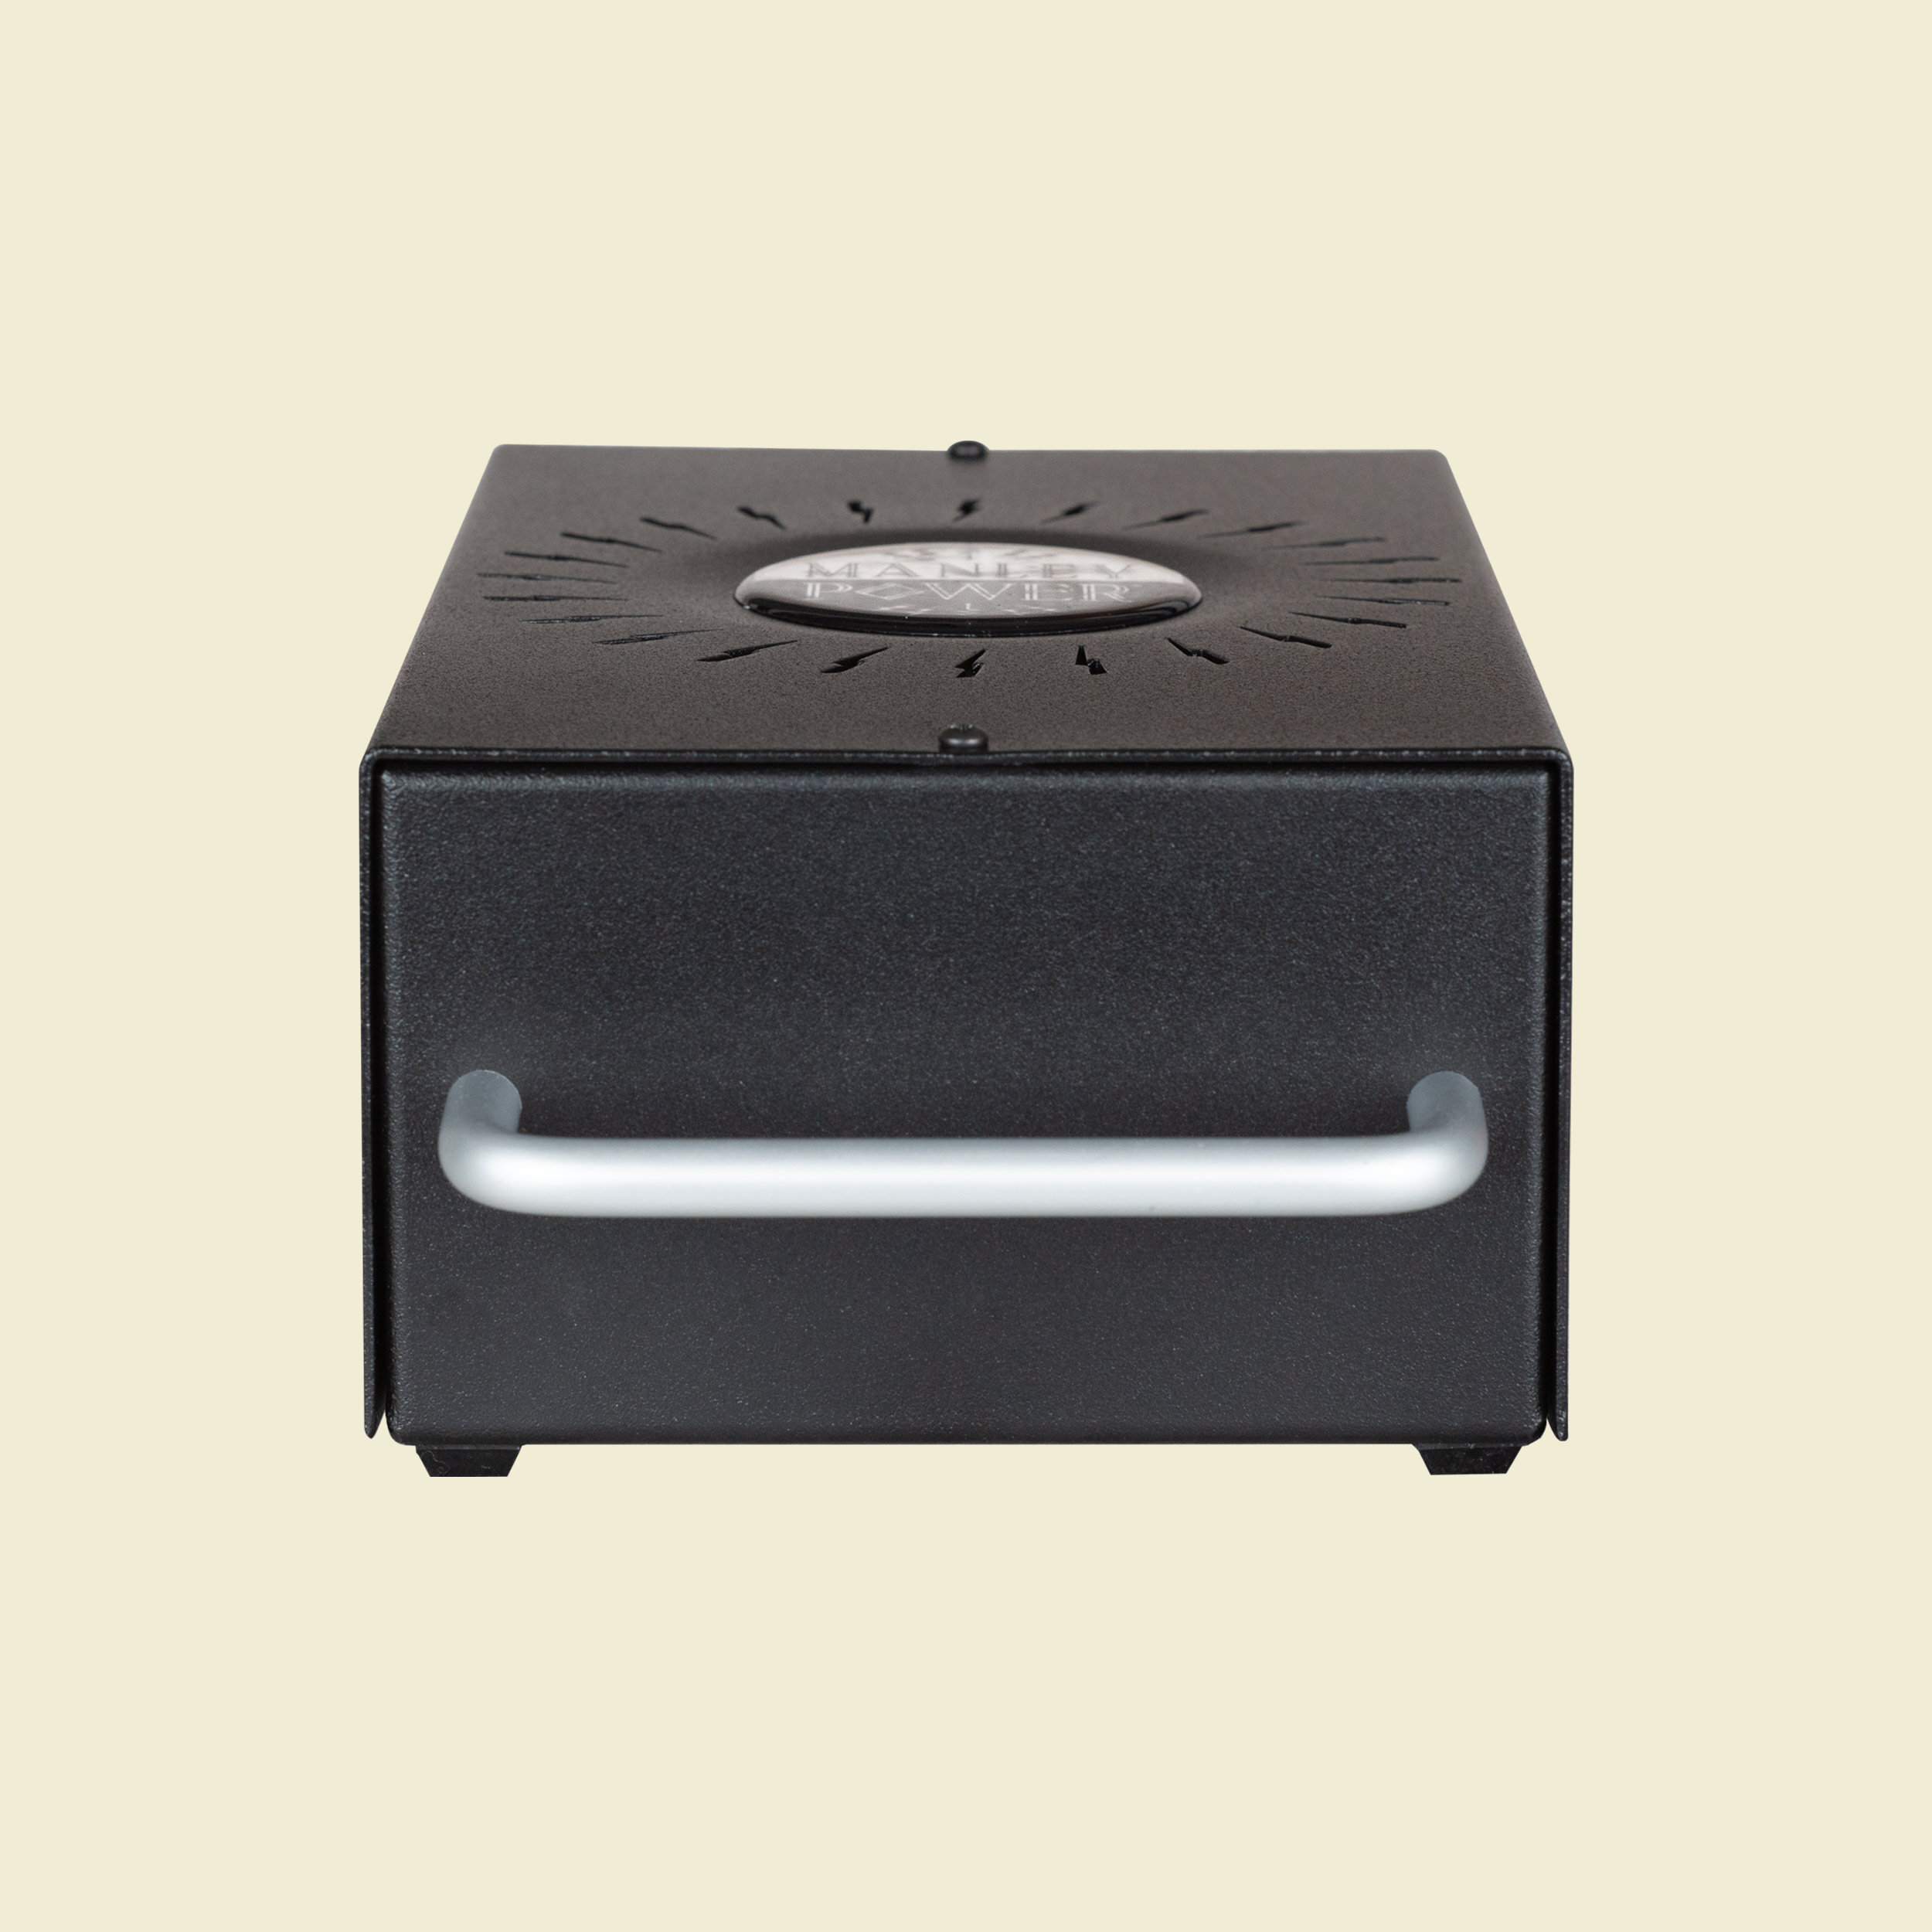
I just got one of your new microphones! What does that red button do on the power supply?
With MANLEY POWER® switch-mode microphone power supplies from mid-2020 onwards (see image on right), there is a red power switch / indicator on the rear side. With an IEC power cable connected, this switch’s LED will glow dimly to show that power is applied. When the switch is pressed to turn the unit on, it will glow bright red. So even if you see the switch glowing slightly, it does NOT mean your microphone is turned on – you still need to PRESS THE SWITCH to provide power to the mic.
Why should I order replacement microphone tubes from you?
The microphone grade tube is tested at the factory for lowest noise, using a test fixture we have built that duplicates the Manley microphone circuit. To the best of our knowledge, there are no other tube vendors that have this purpose-built tester. This testing yields very few tubes suitable for use in the microphones.
Tube quality, especially noise characteristics, varies over time and batch-to-batch. At any particular point in time, we may be using a different tube than what is listed. There is nothing "special" about a Sovtek or Ruby, or anything else we use; what is special is the characteristics we grade and select for including the low noise requirement, and the testing required to insure this.
Will the heat from the tube damage the capsule if I use the microphone upright?
Not at all. Our microphones can be used in any position, any orientation.
How to change the O-RINGS:
The mic suspension is held onto the mic by a set of red silicone o-rings connecting FIVE pillars surrounding the mic, one set on the top and the other on the bottom of the mic. There are two sets of stainless steel screws and spacer nuts that hold the silicone o-rings onto these points and all you do is loop the o-rings onto these posts inner and outer. You can double up the o-rings for extra security and put two of 'em on each point and order two sets (20 total) if you'd like to.
If you needs to order more o-rings, you can order a set of them from our parts store, www.tubesrule.com. They are RED SILICONE #114 O-RING's.
How to change a TUBE:

Here is a video that explains the general concept for the Manley Reference Mono microphones. Read on for more details: Disconnect the power cable at the mic. Do not remove the mic suspension. You never need to. Remove the three phillips screws at the base (red part) of the mic that hold the case on. Grasp the body of the mic with one hand, grasp the base with the other hand. Carefully pull at the base of the mic (sometimes a slight twist will help), and slide the base out of the body just enough to expose the tube. Grasp the tube while holding the tube socket, and wiggle and pull to remove it. Install a new tube and put the case back on.
BUZZ! My mic started buzzing! Those damn bees...

There are a few sources of hummmmmm or buzzzzzzzzzz sneaking into your system, and here are a couple of things to pay attention to with Manley microphones.
First: On the newest MANLEY POWER® power supplies with the 7-pin connector cables, dig into your owner’s manual and read up on setting the Ground Lift Switch inside there and see if that doesn’t fix your installation.
Next: Is it something on the chassis/body of the mic? Here is a video that explains the general chassis grounding intents for the Manley Reference Mono microphones. Read on for more details: If you have a buzz through the audio coming from your microphone, that can be a ground continuity problem with the body of the mic making good ground connections. If the mic is buzzing when you are holding it only by its suspension or it is just setting on a table or on a mic stand and it stops when you touch the body and grill with your hand, then you need to check out all the grounding points on the mic.
For all of these tests, you never have to remove the suspension from the mic body. It can stay attached always.
The easiest first thing to check is the two (or three on older mics) flat head Phillips screws that secure the body-tube of the mic to the base. With the mic on a towel on a table (so you don't scratch it) lying down sideways, using a #1 Phillips Screwdriver, loosen and remove the body-to-base screws. The Manley Reference Gold Mics do not require this procedure as gold is conductive. On the Reference Cardioid Mic, the black anodize under the flat head screws should be removed exposing the aluminum in the countersunk cone-shaped hole. If it's not showing silver in the countersink hole, use a 1/4" or 3/16" drill bit with your fingers to gently rotate the drill bit in the countersink to scrape away the anodize layer to expose the underlying aluminum.
Note that current production Manley mics use a stainless-steel 4-40 x 1/4" flathead screw in conjunction with an angled star washer to really dig in and make a good ground connection. Before that zinc-plated screws were used. If you happen to have black-oxide screws in your very old Manley mic, let's replace those with the stainless screw plus the internal tooth countersunk crinkle washer.
Now slide the body-tube of the mic away from the base just a little bit to expose the innards of the base of the microphone. Slide up and wiggle. (The base and guts of the mic are all contained by a sub-chassis.) Repeat the drill bit exercise with the two (or three in older Manley mics) that those body-to-base mounting screws go into so that the bottom of the angled flat head screw digs into the exposed aluminum of the threaded hole. Rotate the drill bit with your fingers to expose the aluminum and create a slight conical seat for the screw.
While you have the base exposed fully, in our older mics, you'll see some tapped holes around the circumference of the base that secure the XLR connector to the base. In really old Manley Gold mics, you'll also have a set-screw holding the 4-pin power connector to the base of the mic. It is important that these connectors are held tight and also that ground is carried to them by the grub screws. Using a 1/16" hex key, or Allen key, find those buried 4-40 x 1/4" grub screws in the base and back them out and re-tighten them to make the ground and physical connection integral again. (Lefty-Loosen, righty-tighty!) In very old mics, black-oxide coated grub screws were used. These days, we would use more conductive stainless steel set screws.
Our newest mic designs use a stock chassis mount XLR connector held by two screws to the bottom end of the microphone base. Let's make sure those 4-40 Flat Head Phillips screws are stainless-steel (or at least zinc-plated) and not black-oxide coated. Let's also remove one at a time and perform the drill bit clearing exercise under the screw head in the countersunk hole to make sure there is a good metal-to-metal contact for best ground connection.
Contact our Parts Department to get an up-to-date screw kit for your mic by filling in the Service & Parts Request Form.
At this point, after you put the mic back together and retest it, if the buzz is still there, with the mic on, see if touching the screen or top of the screen makes any buzz go away. Hold the XLR cable shell so you are making the ground path between the screen and the XLR cable metal shell. If the screen is loose, it will need to be epoxied back in place with silver conductive epoxy. If touching the case makes the buzz go away then we still have grounds not being made in the base of the mic so go back and repeat the base-screws grounding exercises.
If you have determined that it is not the screws, and it's not the screens, the next step would be to replace the vacuum tube with any good working 12AX7 or 12AT7 or 6072 you have kicking around to see if the tube is the problem. Sometimes tubes just do not rule...
Next step would be more advanced, specific to the older linear power supplies: checking the power supply volts, especially the heater regulator to make sure you have 12V coming off him... looking for a bad cap in the PSU that isn't doing his job of removing ripple, etc. If nothing you try works then we'll arrange an RA# for you to send it in. Give us a holler on the Manley Service Request Form if you need more help or a schematic.
Here’s one new on us! One customer in Los Angeles wrote to us with this cure: I have news that may be helpful for other clients- the noise was emitting from the Los Angeles power company’s electric meter located inside my commercial facility!
Amazingly, one sheet of aluminum foil over the city’s meter completely removes the noise being picked up by the Ref C. Easy fix- As such, I don’t feel a need to mod the mic. If you have any LA clients, particularly in a business location, with the noise, have them check the LADWP meter near them. Wonders never cease! Thank you and EveAnna!
I hear hissy spitting noises. Is my capsule bad?

Here is a video that explains the general concept for the Manley Reference Mono microphones. Read on for more details: When the mic capsule is near the end of its life, generally the mic will get noisy. If the vacuum tube gets noisy, generally it will be “white” noise (hiss), and will be constant in nature. Capsule noises can be intermittent and inconsistent. A bad capsule can be fine for a while, but may get noisy after brief usage, or with differences in temperature, humidity, etc. A quick test to determine if the capsule is at or nearing the end of its life is as follows: Connect the mic so it can be monitored with headphones. While listening, exhale gently directly into the windscreen at close range. You can say “HAAA” into the microphone. If there is a big “rushing” noise, whistling noises, or the sound completely fades away, this is a good indication that the mic capsule probably needs replacement, or at least a professional cleaning. Contact us using the Manley Service Request Form if you need us to look at this for you.
The capsule life is affected by age, temperature extremes, physical abuse, and high humidity. Mics in a high humidity environment or those that live close to the ocean generally have a shorter life than those kept in dry climates. Because the grill weave is very open to allow all of the high frequencies to get through, this also allows spit from a close vocalist to get to the capsule. It is recommended to use a Pop Screen / Filter to keep your capsule cleanest.
When I touch the pattern control bezel, there is a buzzy sound coming out of my audio!
Yeah, there sure is! Ideally you should power off the mic when using the tool to change the capsule’s polar pattern. That is a high impedance point of the circuit and the polarizing voltage shows up on the center screw. While we added a plastic part for the square key to engage in order to isolate it from you shorting it out to the grille, best practice will be to turn the microphone OFF while changing the pattern from Cardioid to Omni. And don’t touch that pattern control bezel while you are recording or, yeah, it will make a noise through your audio chain!
I opened up mic mic and this round washer looking thing fell out. What the hell?
Ayyyyyyy sorry, that is the circlip that holds the pattern adjust bezel. Sometimes our ladies did not get it seated all the way into the bezel’s groove. It will be very difficult for you to re-install it without being able to remove the top ring. (It was installed before the top ring was set into place.) You can try, but otherwise, accept our apologies for employing humans and contact our parts department to work out a solution.
I’ve tried changing the tube and the crackling crunchy sound is still there. Who is causing that?
First: is it a bad cable? Try wiggling the cable at the base of the microphone and see if you can make the problem occur. Second: We have seen the 100 Ohm resistor in the B+ rail go noisy. Try up-rating that with a 2 or 3 Watt resistor. Yes we know it’s only dissipating like nothing, but it seems to benefit by just putting a big guy in there. Third: the 0.027uF polycap. You can try replacing that one. Fourth: on the first several production runs, where the tube PCB intersects the main PCB, that area has been problematic. Affected units carry serial numbers earlier than MRAG160. We might need to roll the guts of your mic for you to the newer style that uses pins and sockets. And yes, confirming that those two “engineers” no longer work for us.
Where is my mic's serial number?
The Manley Reference Microphone serial number is located on the inner face of the mic suspension plate flanking the hole where your mic stand attaches to the mic suspension.
I need a frequency response plot and a polar response chart!
In 30+ years of producing microphones we have never provided plots and charts as we do not have an anechoic chamber or empirically correct measuring space that would give you useful charts. So we don’t provide half-assed ones either. I have visited a microphone manufacturing facility in China and I witnessed a lady drawing a pretty curve by hand for each microphone they were packing up… yeah, really.
I need to buy a new cable but I don’t want to spend the shipping cost to buy your OEM cable and have to ship it to the UK when I can just buy one locally. Why should I buy your cable?
Without being able to clarify and qualify the specific cable in the UK you are contemplating purchasing, we cannot advise on any differences between what we know and what we do not know.
If you want a cable that is guaranteed to function properly, is wired correctly, provides best shielding practices, accommodates the audio signals and high current heater lines to specification, is built with longevity as a priority using premium connectors and wire made to our specifications, and is backed by our own warranty, then you should buy the Manley OEM cable. Otherwise, you are on your own to make the decision to use a non-OEM cable and put your microphone system out of warranty. Best luck with that.

My Manley Reference Microphone came with this neat metal swivel mount, but I'm not sure how to install and use it. Help?
Watch this video to learn all about it.

Oh and by the way, use a heavy mic stand and don’t knock it over! But if you do, the outer suspension rings are easy enough to replace.
